ADDIE Model Explained: The Complete Implementation Guide for L&D Professionals
TL;DR: The ADDIE model (Analyze, Design, Develop, Implement, Evaluate) is the foundational instructional design framework used by L&D professionals to create effective training programs. This guide covers step-by-step implementation strategies, real-world examples, and expert tips for maximizing training ROI using this systematic approach.
What is the ADDIE Model?
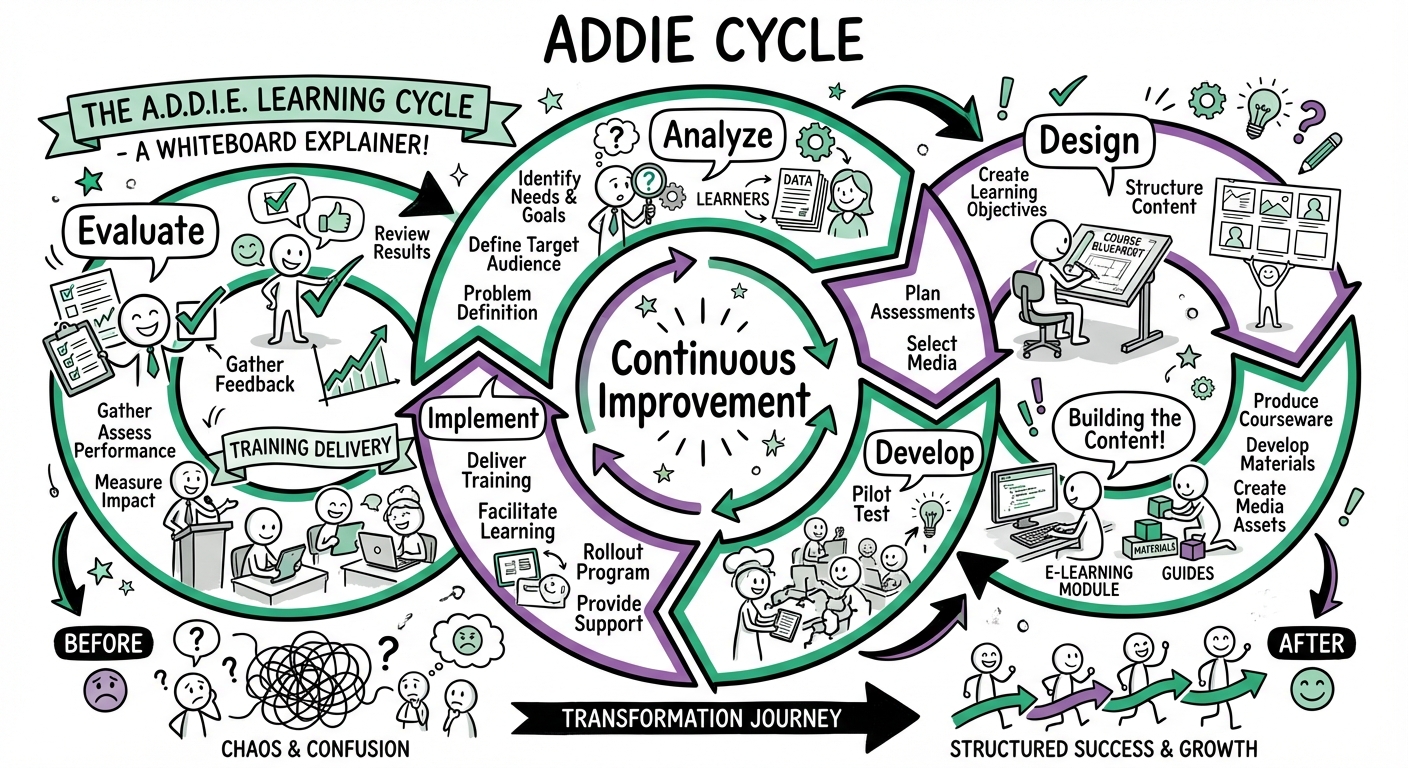
The ADDIE model is a systematic instructional design framework used to create effective, efficient, and engaging learning experiences. Originally developed in the 1970s for the U.S. Army by Florida State University, it has evolved into the gold standard for Learning and Development (L&D) professionals worldwide.
ADDIE represents five sequential phases:
- Analyze: Identifying learner needs, performance gaps, and organizational constraints.
- Design: Creating the learning blueprint, objectives, and instructional strategy.
- Develop: Authoring and producing the actual training content and materials.
- Implement: Delivering the training to the target audience.
- Evaluate: Measuring effectiveness and impact to drive continuous improvement.
While often visualized as a waterfall (linear) process, modern application of ADDIE is iterative. Each phase informs and refines the others, allowing for continuous feedback and adjustment throughout the development lifecycle.
Phase 1: Analyze – The Foundation of Effective Training
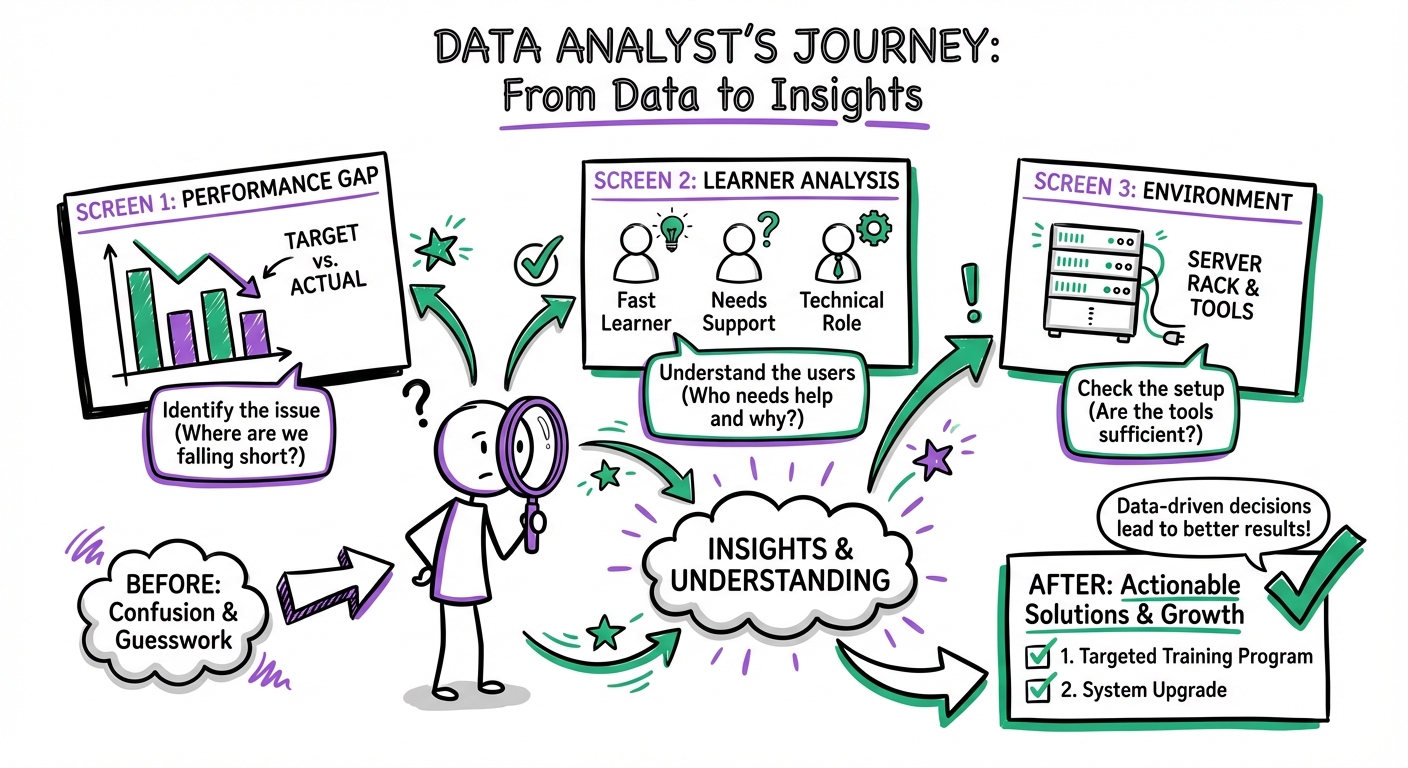
The Analysis phase is the bedrock of successful instructional design. Skipping this step is the most common cause of training failure. This phase determines if training is the right solution and establishes the parameters for the project.
Key Analysis Components
1. Performance Gap Analysis
Identify the delta between current and desired performance. Ask:
- Current State: What are employees doing now?
- Desired State: What should they be doing?
- The Gap: Is this gap caused by a lack of knowledge/skill (training solution) or a lack of motivation/resources (management solution)?
2. Learner Analysis
Design for the specific audience, not a generic user. Define:
- Demographics: Job roles, experience levels, and location.
- Prior Knowledge: What do they already know about the topic?
- Tech Proficiency: Are they comfortable with the proposed delivery method?
- Constraints: Do they have time to train? Do they have audio capabilities?
3. Environmental Analysis
Map the organizational context:
- Resources: Budget, available SMEs, and existing content.
- Technical Infrastructure: LMS capabilities, bandwidth, and firewall restrictions.
- Business Goals: What specific KPI is this training intended to impact?
Analysis Tools & Techniques
| Tool | Best Used When | Output |
|---|---|---|
| Surveys | You need quantitative data from a large, dispersed audience. | Broad trends and baseline data. |
| Interviews | You need to explore complex performance issues with key stakeholders. | Deep qualitative insights and buy-in. |
| Observation | There is a discrepancy between what people say they do and what they actually do. | Real-world workflow mapping. |
| Data Review | You have access to existing metrics (CSAT scores, error rates). | Objective performance evidence. |
Expert Tip: Don't assume training is the answer. If the analysis reveals that the performance gap is due to broken tools or unclear processes, training will be a waste of budget. Be the consultant who recommends fixing the process instead of building a course.
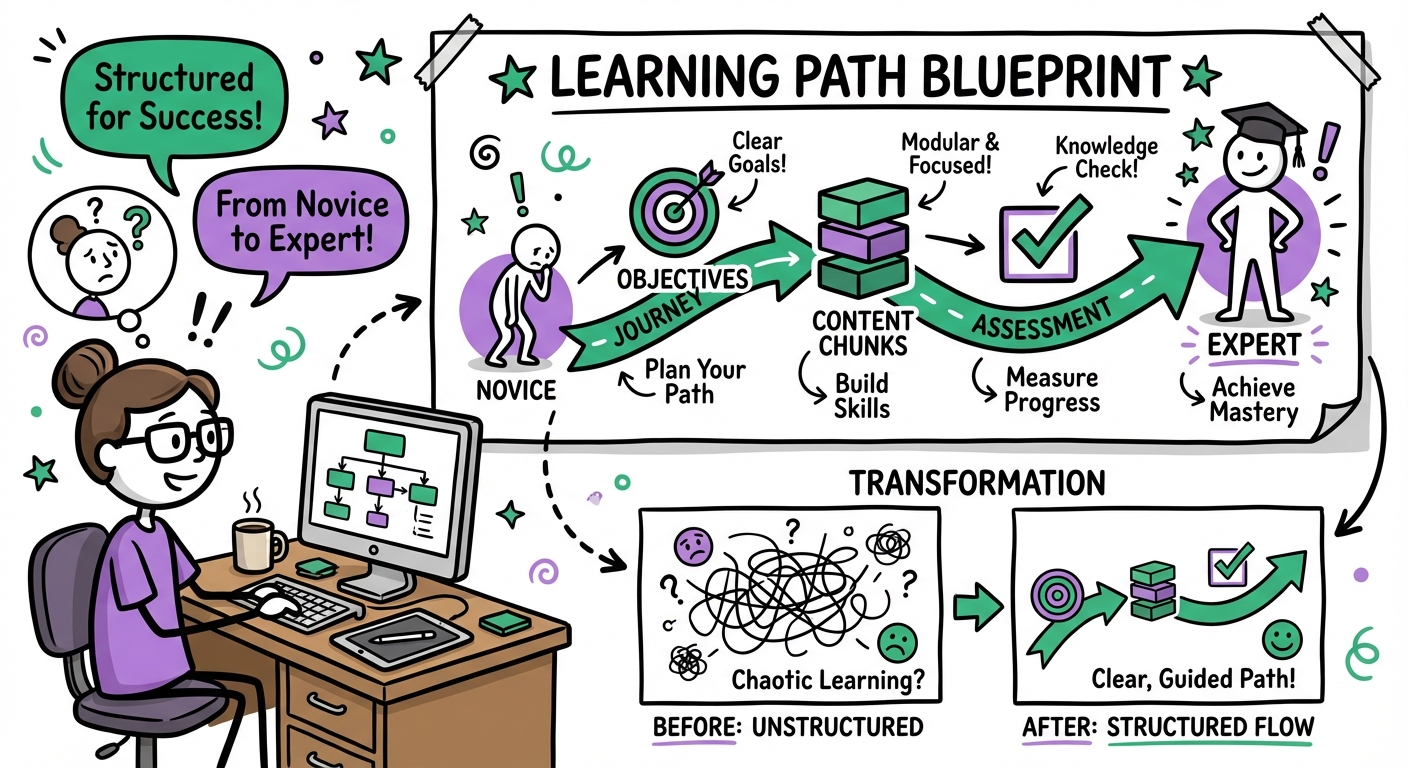
Phase 2: Design – Creating Your Learning Blueprint
The Design phase transforms analysis insights into a concrete plan. This is where you storyboard the experience before building it. Think of this as the architectural blueprint before construction begins.
1. Establishing Learning Objectives
Objectives guide the content. Use Bloom’s Taxonomy combined with the SMART framework (Specific, Measurable, Achievable, Relevant, Time-bound).
- Bad Objective: "Understand safety protocols."
- Good Objective: "Identify three common fire hazards in the warehouse and demonstrate the correct use of a Class B fire extinguisher."
2. Selecting Instructional Strategies
Match the strategy to the learning type:
- For Knowledge (Facts/Concepts): Microlearning videos, interactive infographics, podcasts.
- For Skills (Processes/Procedures): Simulations, software sandboxes, role-playing scenarios.
- For Attitudes (Behavior/Culture): Storytelling, emotive video, peer discussions, gamification.
3. Content Architecture & Storyboarding
Before opening an authoring tool, map the structure:
- Chunking: Break complex topics into 5-10 minute segments to reduce cognitive load.
- Sequencing: Order content logically (e.g., Simple to Complex, or Chronological).
- Storyboarding: Create a visual script that details the text, visuals, audio, and interactions for every screen.
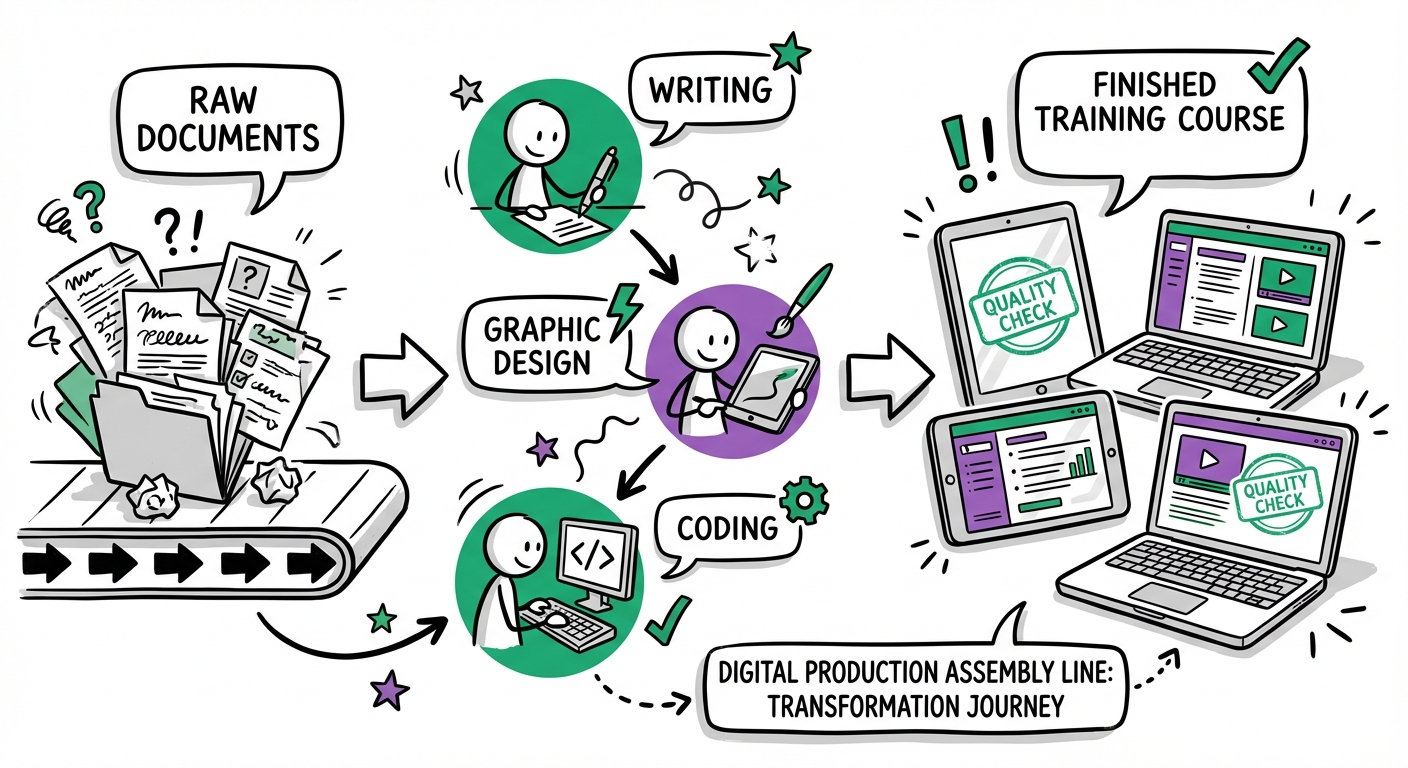
Phase 3: Develop – Building the Training Assets
The Development phase is where the design comes to life. You are now creating the actual assets—videos, e-learning modules, manuals, and job aids.
Content Development Best Practices
- Visual Hierarchy: Use headers, bullet points, and bold text to make content scannable.
- Multimedia Balance: Use visuals to explain, not just decorate. Ensure audio matches the on-screen text to avoid cognitive dissonance.
- Accessibility (a11y): Ensure all content meets WCAG standards (alt text for images, captions for video, keyboard navigability).
The Quality Assurance (QA) Framework
Never publish without a rigorous QA process.
- Alpha Review: Internal team checks for functionality and flow.
- SME Review: Subject Matter Experts validate factual accuracy.
- Beta Pilot: A small group of learners tests the course in the actual delivery environment.
- Gold Master: Final polish before launch.
Rapid Development Tools
To speed up this phase, utilize:
- Authoring Tools: Articulate Storyline, Adobe Captivate, Rise 360.
- Asset Libraries: Stock photos and templates to avoid designing from scratch.
- AI Generators: Use AI for voiceovers, image generation, or drafting quiz questions.
Phase 4: Implement – Delivering the Training
The Implementation phase is the launch. It involves the logistics of delivery and the change management required to get learners to actually take the training.
Pre-Launch Checklist
- LMS Testing: Verify SCORM/xAPI tracking is recording completions correctly.
- Communication Plan: How will learners know the training exists? (Email campaigns, manager announcements, Slack/Teams notifications).
- Support Structure: Who do learners contact if they have technical issues?
Launch Strategies
| Strategy | Best For | Pros | Cons |
|---|---|---|---|
| Pilot Launch | High-stakes/Complex programs | Allows for final tweaking; lowers risk. | Extends timeline. |
| Phased Rollout | Large organizations | Easier to support; manages server load. | Complexity in coordination. |
| Big Bang | Compliance/Urgent updates | Everyone gets info simultaneously. | High risk if bugs exist; support overload. |
Driving Adoption
Implementation is 50% technology and 50% psychology. Address the "WIIFM" (What's In It For Me?) for the learner. Ensure managers are briefed before the launch so they can support their teams.
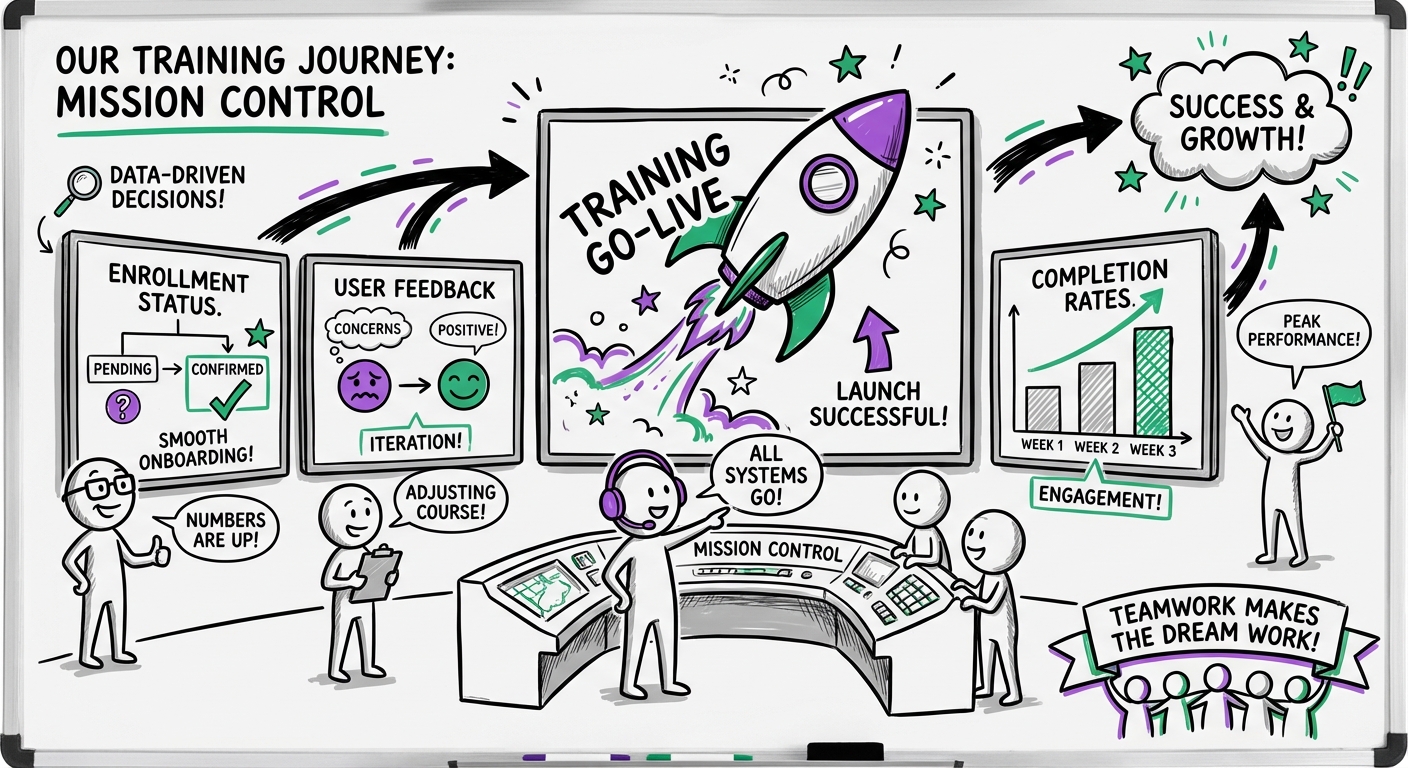
Phase 5: Evaluate – Measuring Success & ROI
Evaluation should not be an afterthought. While listed last, evaluation planning begins in the Design phase. This phase determines if the training worked and how to improve it.
Kirkpatrick’s Four Levels of Evaluation
- Level 1: Reaction (Did they like it?)
- Method: Post-training surveys (Smile sheets), NPS scores.
- Metric: Learner satisfaction and engagement.
- Level 2: Learning (Did they learn it?)
- Method: Pre/Post-tests, simulations, skill demonstrations.
- Metric: Knowledge acquisition and skill competency.
- Level 3: Behavior (Did they use it?)
- Method: Observation checklists, 360-degree feedback, manager reviews 3-6 months later.
- Metric: On-the-job application and behavior change.
- Level 4: Results (Did it impact the business?)
- Method: Business data analysis (sales figures, error rates, support tickets).
- Metric: ROI and business impact.
Calculating Training ROI
To prove value to leadership, use the ROI formula:
$$ROI (%) = \frac{\text{Monetary Benefits} - \text{Training Costs}}{\text{Training Costs}} \times 100$$
Example: If a training program costs $50,000 to build and deploy, and it results in $150,000 of saved labor due to efficiency gains:
- ($150,000 - $50,000) / $50,000 = 2.0
- ROI = 200%

ADDIE vs. Agile (SAM) vs. Design Thinking
Is ADDIE still relevant? Yes, but it helps to know the alternatives.
| Feature | ADDIE | SAM (Successive Approximation Model) | Design Thinking |
|---|---|---|---|
| Approach | Structured, systematic. | Iterative, rapid prototyping. | Human-centered, exploratory. |
| Best For | Compliance, large-scale rollouts, foundational knowledge. | Projects with unclear requirements, rapid deadlines. | Solving complex, ambiguous user problems. |
| Risk | Low (thorough analysis). | Medium (fail fast, fix fast). | Variable (innovation focused). |
Verdict: Use ADDIE when accuracy and completeness are critical (e.g., safety training). Use Agile/SAM when speed is the priority and content is likely to change.
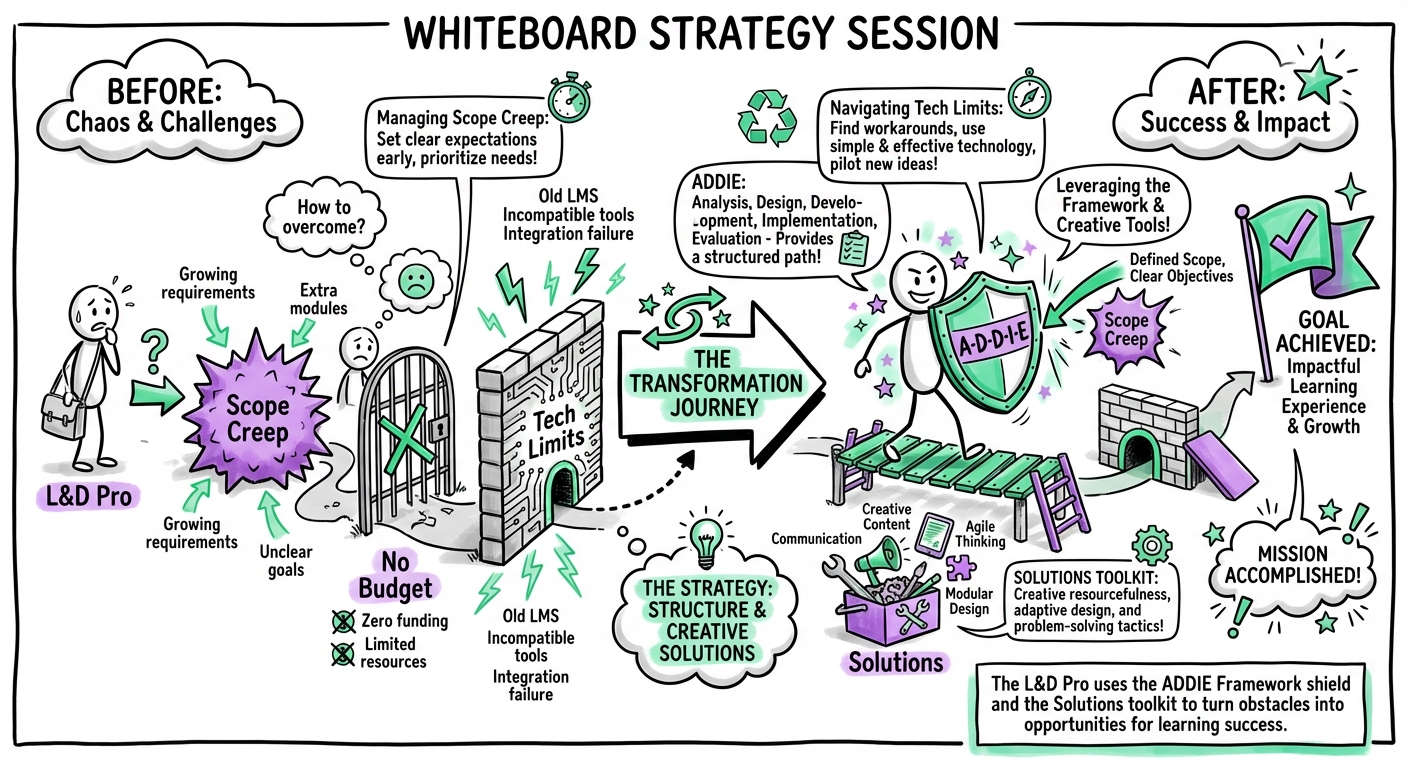
Common Implementation Challenges & Solutions
1. Stakeholder Resistance to Analysis
- Problem: "We don't have time for analysis, just build the course."
- Solution: Frame analysis as "Risk Mitigation." Explain that spending 2 days on analysis prevents spending 2 months building the wrong course.
2. Scope Creep
- Problem: Stakeholders keep adding content during development.
- Solution: Sign off on a detailed Design Document (Phase 2). Any changes after sign-off require a formal change request or are moved to "Phase 2" of the rollout.
3. The "Training is the Only Solution" Trap
- Problem: Managers request training for behavioral issues.
- Solution: Use the Analysis phase to identify if the issue is actually a lack of incentives or tools. Be honest if training isn't the fix.
The Future of ADDIE: AI and Agility
ADDIE is evolving, not disappearing. The modern L&D professional uses "Agile ADDIE":
- AI-Enhanced Analysis: Using AI to analyze large datasets of employee performance to pinpoint gaps instantly.
- Generative Design: Using LLMs to draft learning objectives and outlines in seconds.
- Automated Development: AI tools that generate video avatars and slide decks, reducing development time by 40%.
By integrating AI, the "Develop" phase shrinks significantly, allowing more time for the critical "Analyze" and "Design" phases.
Building Your ADDIE Implementation Team
Depending on the scale, an ADDIE project might be a one-person show or a full squad.
- Instructional Designer (ID): The architect. Owns Analysis, Design, and Evaluation.
- Subject Matter Expert (SME): The content source. Validates accuracy.
- LMS Administrator: Manages Implementation and technical delivery.
- Developer: Builds the assets (if the ID doesn't).
- Project Manager: Keeps the timeline and budget on track.
Need help scaling your team? Platforms like Learnexus connect organizations with pre-vetted instructional designers and developers who specialize in the ADDIE framework, allowing you to scale your L&D capabilities on demand.
Frequently Asked Questions
Q: How long does the ADDIE process take? A: It varies wildly. A simple microlearning module might take 2 weeks; a comprehensive certification program could take 6 months. A general industry standard is 40 hours of development for 1 hour of finished e-learning.
Q: Can I skip the Evaluation phase? A: You can, but you shouldn't. Without evaluation, you cannot prove ROI to leadership, putting your future budget at risk.
Q: Is ADDIE too linear for modern business? A: Only if you let it be. Treat ADDIE as a cycle, not a straight line. Prototype early (during Design) to get feedback before you commit to full Development.
Q: What is the difference between ADDIE and PADDIE? A: PADDIE adds a "Planning" phase at the very beginning to account for project management, budgeting, and resource allocation before Analysis begins.
Ready to implement ADDIE in your organization? Start by analyzing your current performance gaps, or reach out to Learnexus to find the expert talent you need to build world-class training.